Product Import Settings
Configure how products are created in Shopify when importing from suppliers. These settings affect product titles, SKUs, variant organization, tags, and images.
Title Format
Available Formats
| Format | Example |
|---|---|
| Product Name | Unisex Jersey Tee |
| Product Name + Part ID | Unisex Jersey Tee (3001) |
| Supplier + Product Name | Bella+Canvas Unisex Jersey Tee |
| Brand + Product Name | BELLA+CANVAS Unisex Jersey Tee |
| Part ID + Product Name | 3001 - Unisex Jersey Tee |
| Custom | Use placeholders |
Custom Title Format
Use placeholders to create custom title formats:
| Placeholder | Description | Example Value |
|---|---|---|
{product_name} | Product name | Unisex Jersey Tee |
{part_id} | Supplier part ID | 3001 |
{brand} | Brand name | BELLA+CANVAS |
{supplier} | Supplier name | Bella+Canvas |
{category} | Product category | T-Shirts |
Example custom format:
{brand} {product_name} - Style {part_id}
→ BELLA+CANVAS Unisex Jersey Tee - Style 3001
Setting Title Format
- Navigate to Settings > Product Import
- Select Title Format
- Choose a preset or enter a custom format
- Click Save
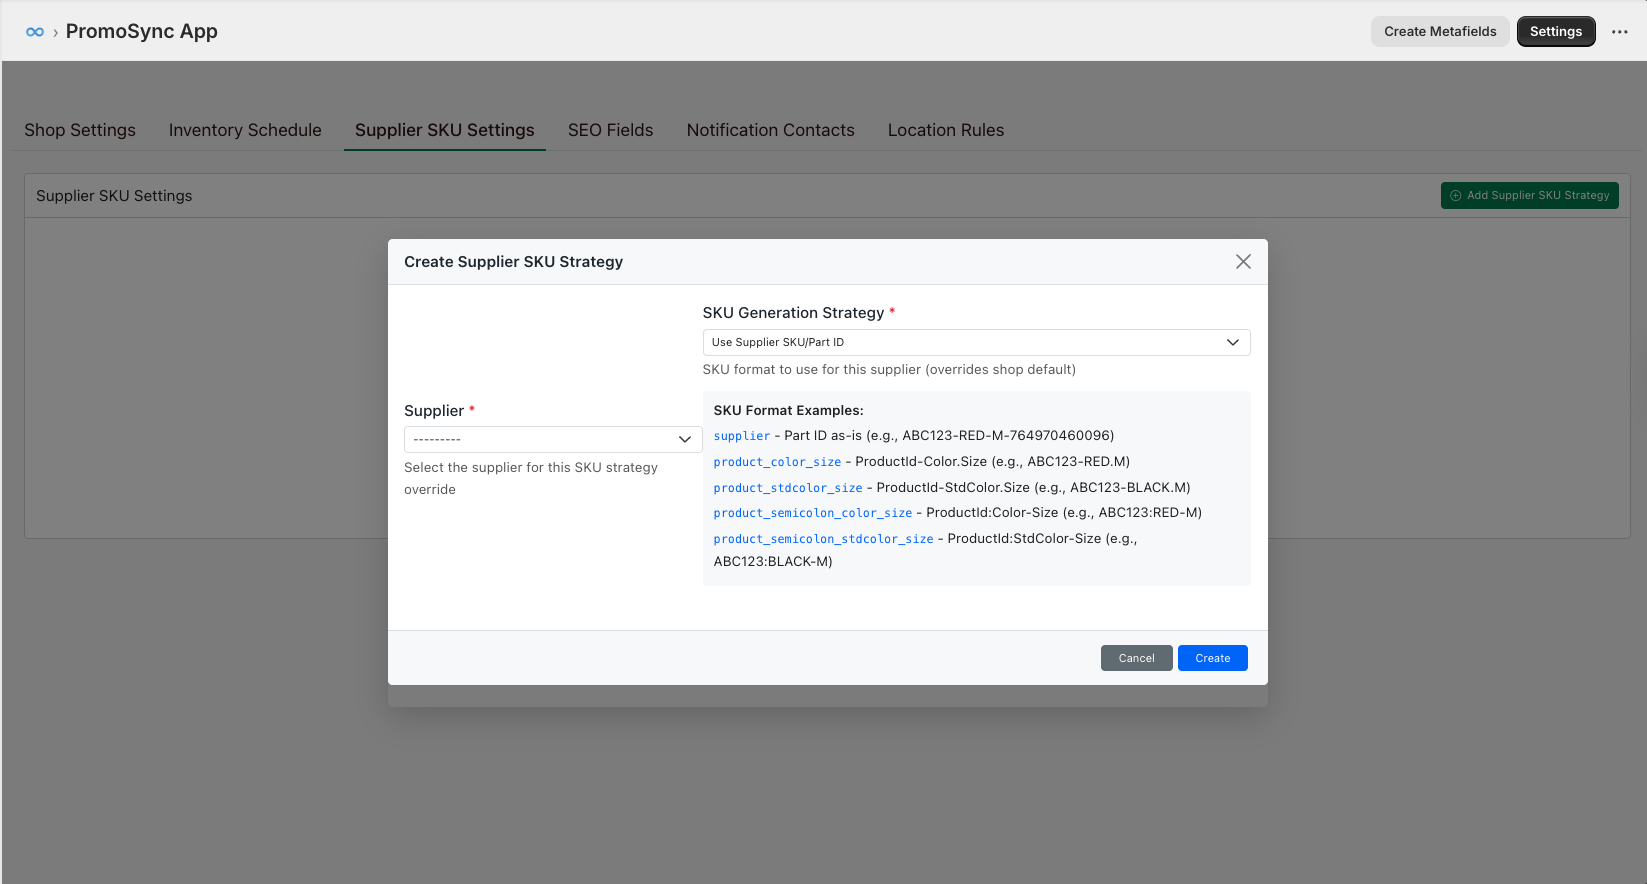
SKU Strategies
Available Strategies
PromoSync offers 7 SKU generation strategies:
| Strategy | Format | Example |
|---|---|---|
part_id | Part ID only | 3001 |
part_id_color | Part ID + Color | 3001-BLK |
part_id_size | Part ID + Size | 3001-L |
part_id_color_size | Full variant ID | 3001-BLK-L |
sku | Supplier SKU | BC3001BLK-L |
upc | UPC/Barcode | 882932789234 |
custom | Custom format | YOUR-3001-BLK-L |
Custom SKU Format
Create custom SKU formats with placeholders:
| Placeholder | Description |
|---|---|
{part_id} | Supplier part ID |
{color_code} | Color abbreviation |
{size_code} | Size abbreviation |
{upc} | UPC barcode |
{prefix} | Your custom prefix |
Example:
{prefix}-{part_id}-{color_code}-{size_code}
→ ABC-3001-BLK-L
SKU Configuration
- Go to Settings > Product Import
- Select SKU Strategy
- For custom, enter your format and prefix
- Click Save
Variant Grouping
Control how product variants are organized in Shopify.
Products built from more than one part (kits, sets, a plush toy with apparel, a tumbler with a color-matched straw) can be imported as a single product with the correct option matrix. See Configurable Products.
Grouping Strategies
| Strategy | Description | Use Case |
|---|---|---|
| Single | All variants in one product | Standard setup |
| By Color | Separate product per color | Large variant counts |
| Split Limit | Split when exceeding limit | Performance optimization |
Single Grouping
All variants appear as one product:
Product: Unisex Jersey Tee
├── Black / S
├── Black / M
├── Black / L
├── White / S
├── White / M
├── White / L
└── (etc.)
By Color Grouping
Creates separate products per color:
Product: Unisex Jersey Tee - Black
├── Black / S
├── Black / M
└── Black / L

Product: Unisex Jersey Tee - White
├── White / S
├── White / M
└── White / L
Split Limit Grouping
Splits products when variants exceed a threshold:
{
  "strategy": "split_limit",
  "limit": 100,
  "splitBy": "color"
}
Shopify’s variant limit is 100. Use this strategy for products with many combinations.
Shopify Taxonomy Category
PromoSync can map each imported product to Shopify’s built-in product taxonomy so it lands in the right category for search, filtering, and Shop Pay. The category is derived from the supplier’s PromoStandards classification data, so no manual taxonomy picking is required.
Shopify Taxonomy Category mapping is populated automatically on the Trial, Business, and Enterprise PSRESTful plans. Shops on other plans can buy this feature individually by enabling it from PromoSync settings.
When eligible, PromoSync sets the product’s category (Shopify’s TaxonomyCategory GID) at import time. If the supplier did not classify the product, or did not provide a Shopify-compatible classification, the field is left unset and Shopify falls back to its own auto-categorization.
To upgrade your plan, visit psrestful.com/pricing.
Color Swatches
PromoSync can render native Shopify color swatches by linking each color option to a custom-color-swatch metaobject populated from PromoStandards color data (label and hex). Themes that support metaobject-linked options will then display real swatches in the variant picker instead of plain text.
Color Swatches are populated automatically on the Trial, Business, and Enterprise PSRESTful plans. Shops on other plans can buy this feature individually by enabling it from PromoSync settings.
When the feature is active for a shop, PromoSync ensures the required metaobject and metafield definitions exist (creating them on first import if missing) and upserts one color metaobject per unique color encountered in the catalog. The color metaobject definition lives at custom-color-swatch with label and hex_color fields and is exposed to the storefront so Liquid can read it.
Color swatches need the write_metaobjects and write_metaobject_definitions OAuth scopes. When a shop is promoted into a plan that grants the feature, PromoSync triggers the standard scope-change banner so the merchant can re-authorize before the next import runs.
To upgrade your plan, visit psrestful.com/pricing.
Tag Management
Automatic Tags
PromoSync can automatically add tags based on product attributes:
| Tag Type | Example Tags |
|---|---|
| Supplier | supplier:sanmar, supplier:ss |
| Brand | brand:bella-canvas, brand:gildan |
| Category | category:t-shirts, category:polos |
| Color Family | color:black, color:blue, color:red |
| Material | material:cotton, material:polyester |
Tag Configuration
- Go to Settings > Product Import
- Enable/disable each tag type
- Configure tag format (with or without prefix)
- Click Save
Custom Tags
Add custom tags to all imported products:
promostandards, synced, {supplier}Vendor Settings
Vendor Assignment
Choose how the Shopify vendor field is populated:
| Option | Value Assigned |
|---|---|
| Supplier Name | SanMar |
| Brand Name | BELLA+CANVAS |
| Custom Value | Your Company |
| Leave Empty | (blank) |
Product Type Assignment
Set the Shopify product type:
| Option | Value Assigned |
|---|---|
| Category | T-Shirts |
| Supplier Category | Apparel > Tees |
| Custom Value | Promotional Apparel |
Image Import Settings
Image Options
| Setting | Description |
|---|---|
| Import Images | Enable/disable image import |
| Primary Image | Which image is set as featured |
| Image Quality | Standard or high resolution |
| Max Images | Limit images per product |
Image Order
Configure the order of imported images:
{
  "imageOrder": [
    "primary",
    "front",
    "back",
    "detail",
    "lifestyle"
  ]
}
Image Alt Text
Automatically generate alt text:
{product_name} - {color} - View {position}
→ Unisex Jersey Tee - Black - View 1
Variant Options
Option Names
Customize variant option labels:
| Default | Custom |
|---|---|
| Color | Garment Color |
| Size | Garment Size |
| Style | Product Style |
Option Order
Set the order of variant options:
{
  "optionOrder": ["Color", "Size"],
  "colorFirst": true
}
Size Normalization
Normalize size values across suppliers:
| Supplier Value | Normalized |
|---|---|
| SM | S |
| MED | M |
| LG | L |
| XLG | XL |
| 2XL | 2XL |
| 2X | 2XL |
Description Settings
Description Format
Choose what to include in product descriptions:
| Content | Include |
|---|---|
| Product Description | ✓ |
| Features List | ✓ |
| Specifications | Optional |
| Size Chart | Optional |
| Care Instructions | Optional |
HTML Formatting
Enable rich HTML in descriptions:
<div class="product-description">
  <p>{{ description }}</p>
  <h3>Features</h3>
  <ul>
    {% for feature in features %}
    <li>{{ feature }}</li>
    {% endfor %}
  </ul>
</div>
Weight and Dimensions
Unit Settings
| Setting | Options |
|---|---|
| Weight Unit | lb, kg, oz, g |
| Dimension Unit | in, cm |
Default Values
Set defaults when supplier data is missing:
{
  "defaultWeight": 0.5,
  "defaultWeightUnit": "lb",
  "requireWeight": false
}
Import Preview
Before importing, preview how products will appear:
// Import preview
{
  "title": "BELLA+CANVAS Unisex Jersey Tee - Style 3001",
  "vendor": "Bella+Canvas",
  "productType": "T-Shirts",
  "tags": ["supplier:bella-canvas", "brand:bella-canvas", "category:t-shirts"],
  "variants": 45,
  "images": 8,
  "price": "$14.99",
  "sku": "3001-BLK-S"
}
Applying Settings to Existing Products
Settings apply to new imports by default. To update existing products:
- Select products in PromoSync
- Choose Bulk Actions > Reapply Import Settings
- Select which settings to reapply
- Confirm the operation
Best Practices
- Test with one product - Import a single product to verify settings
- Use consistent SKUs - Choose a strategy and stick with it
- Optimize for SEO - Include relevant keywords in titles
- Control variant count - Use grouping to manage large catalogs
- Tag strategically - Enable tags that help with collections and filtering